
How to Make Your Own Metallic Wave Menus with Canva and Cricut
Here’s how I created these menus using one of my template designs (get it here!), metallic cardstock and Cricut.
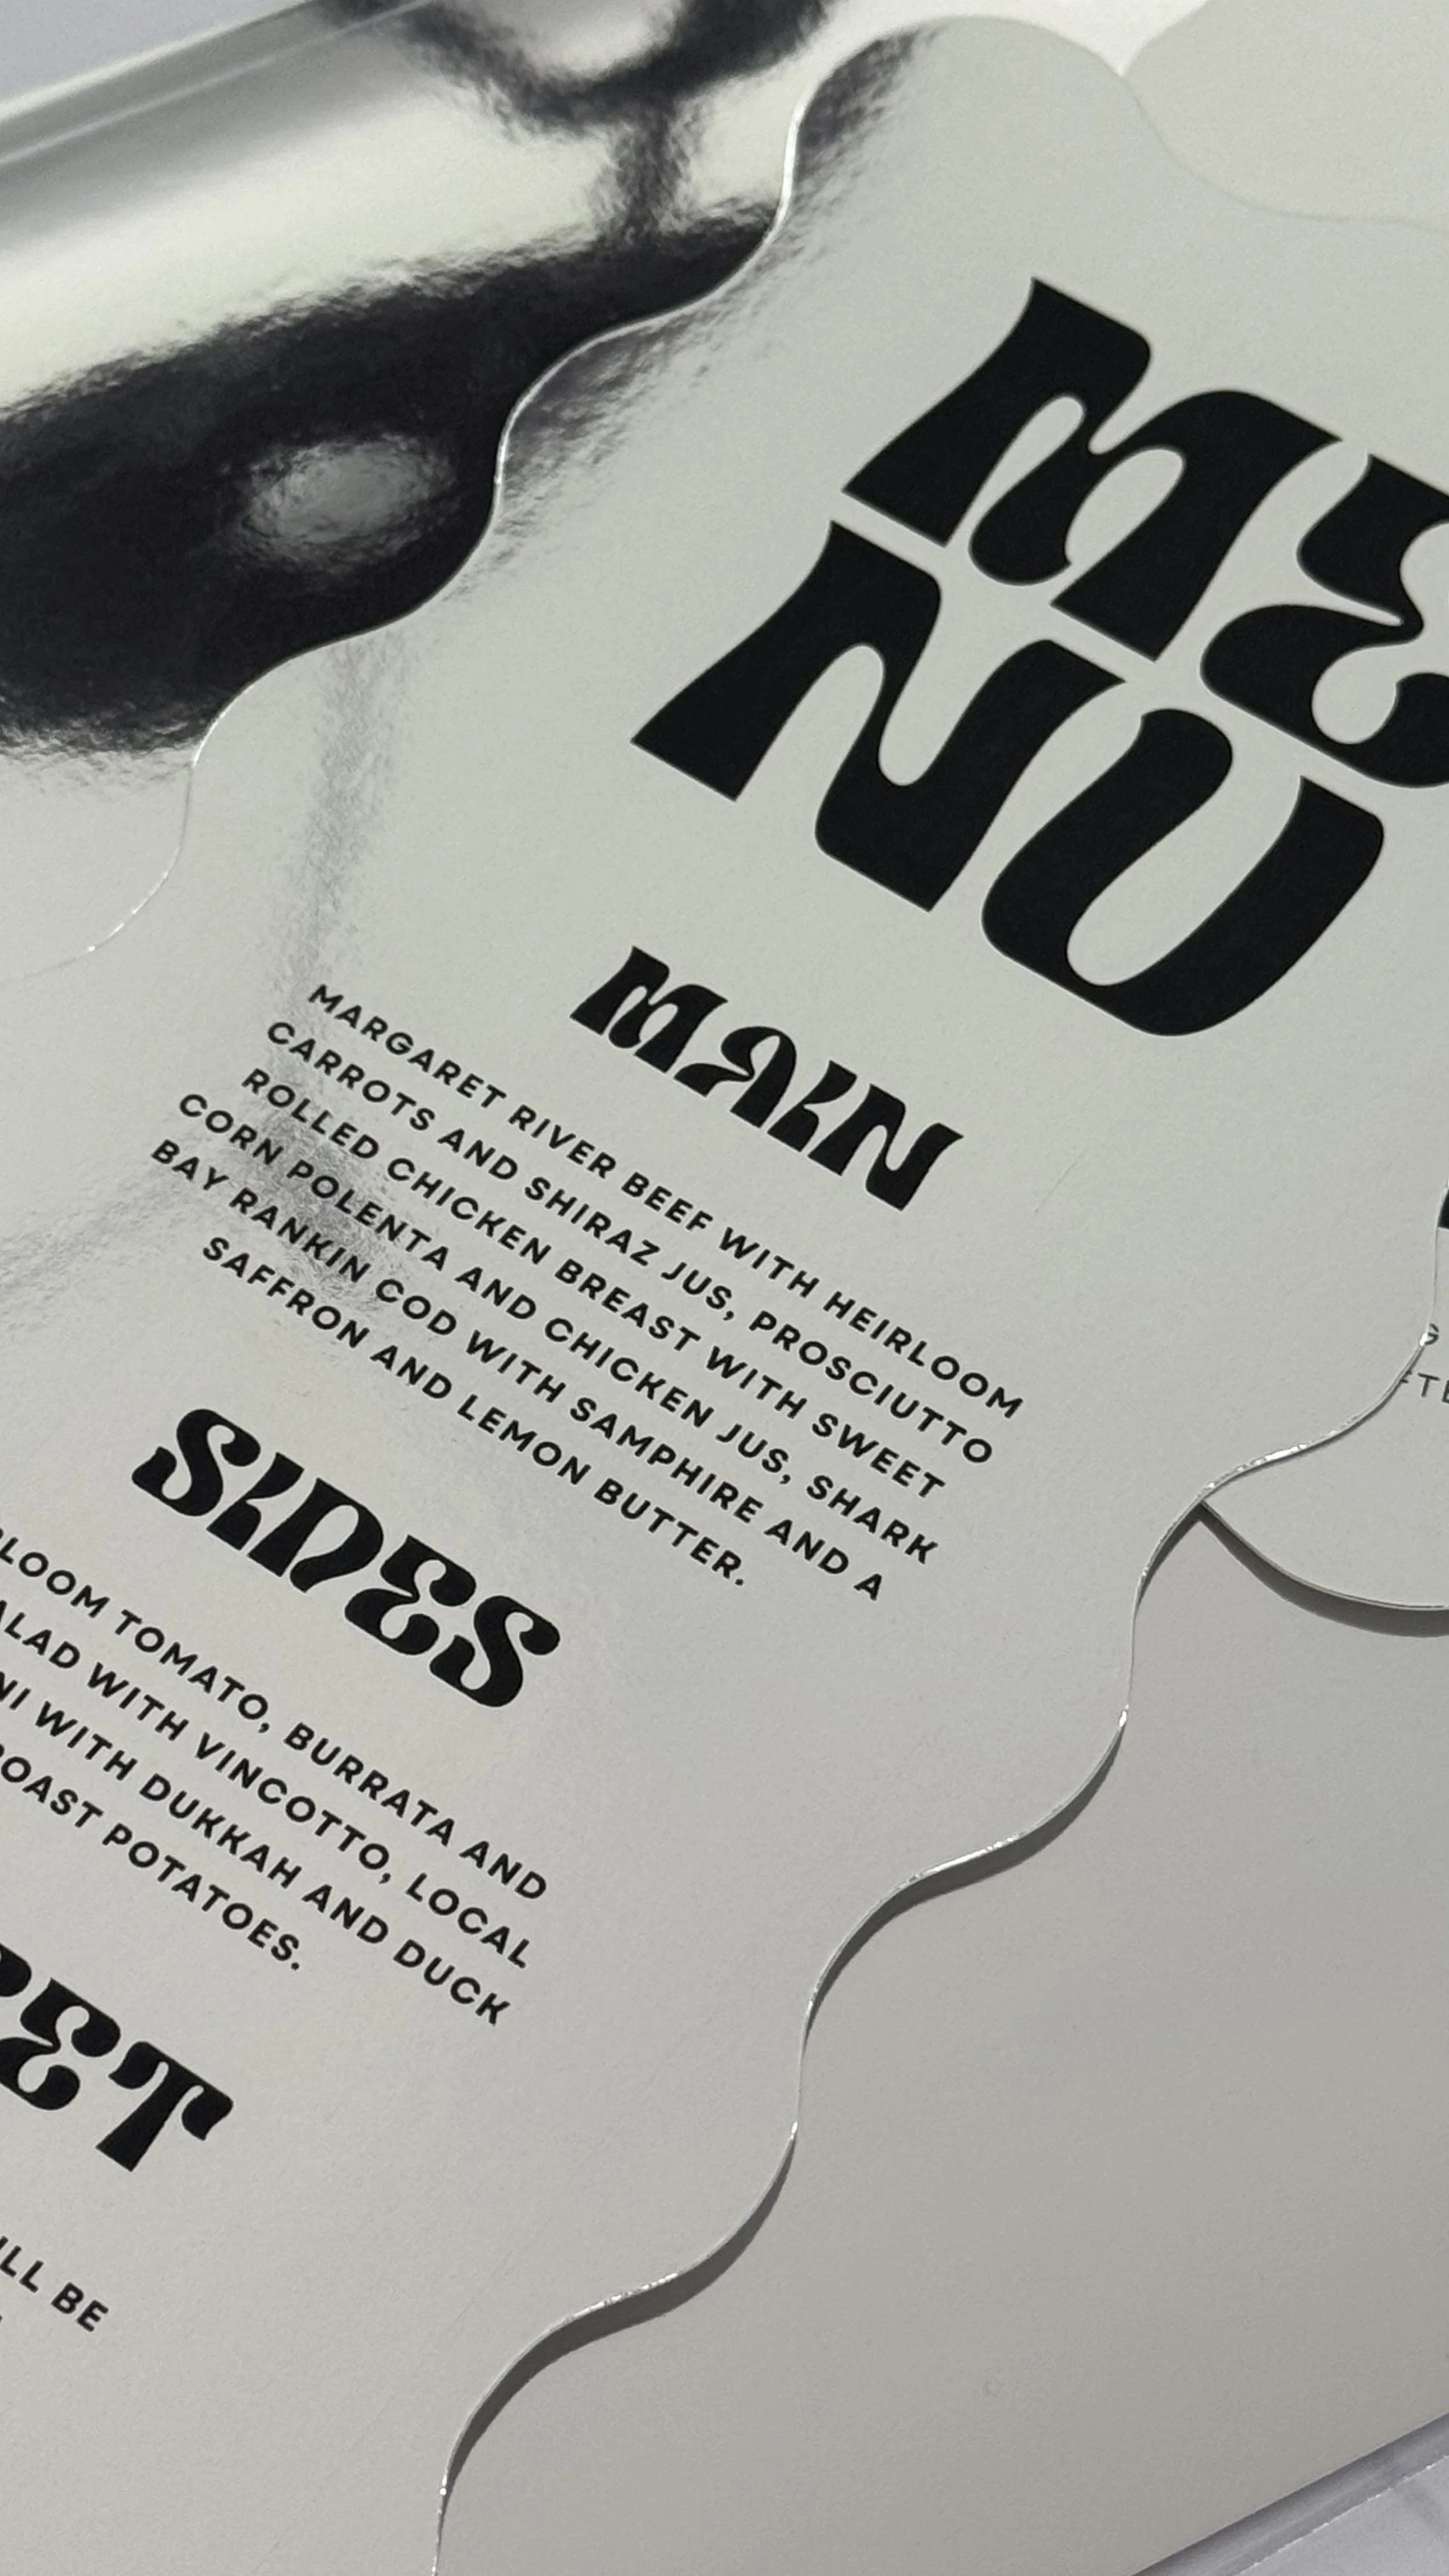
01. Choose your template and add your information.
I have used my ‘Retro - DL Wave Menu’ This comes with the wave shape files you need to cut out the finished design. The design template is editable in Canva.
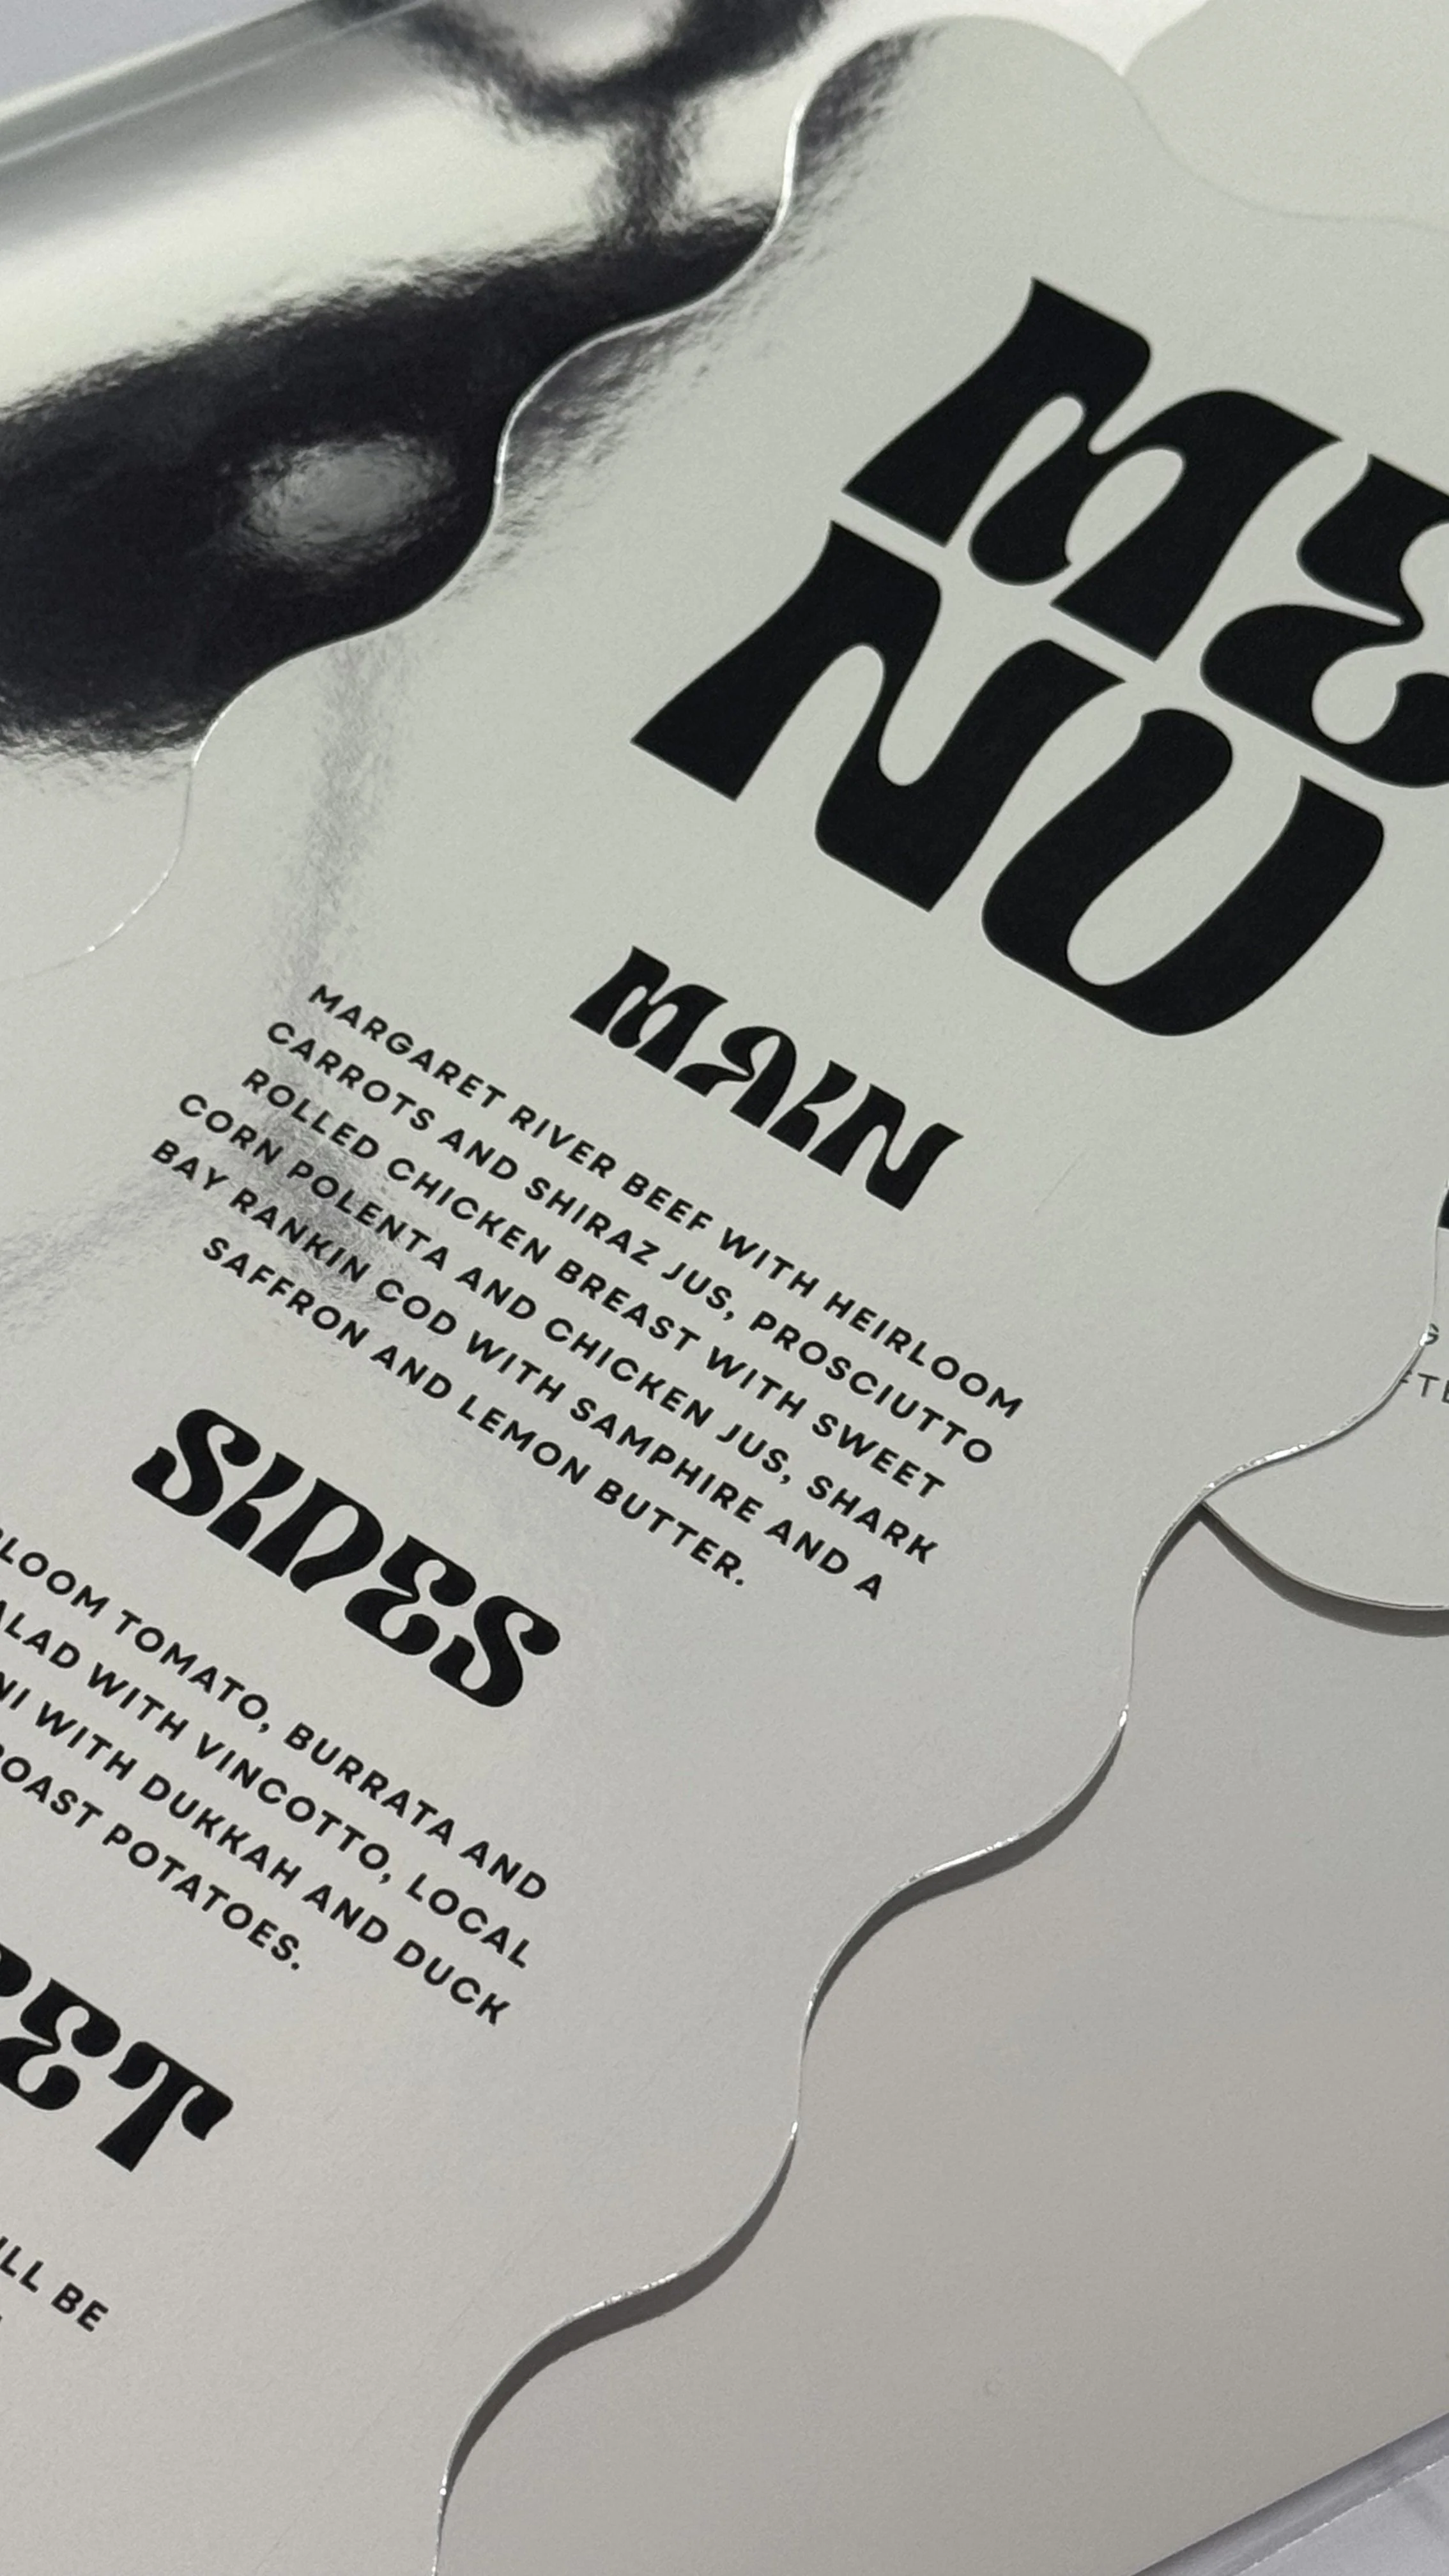
99 × 210mm Wave Menu
These retro inspired menus are fully editable in Canva, so you can personalise the colours, and wording to suit your wedding in minutes. Perfect for printing at home or through a professional printer.
What’s Included:
DL Menu (99 × 210 mm) template
DL Wave Shape files (99 × 210 mm)
.png
.svg
Important Information:
This is a digital product – no physical item will be shipped.
Editing – Template is fully editable in Canva.
Access – After purchase, you’ll receive a link to your Canva template.
Printing – Download as PDF for print or JPG/PNG for digital use. Can be printed at home or through a professional printer. Product images are examples only. See the Printing tab for our recommendations.
This template includes shape files for cutting your final design using a Cricut Machine, you can find the instructions here.
Terms of Use – For personal use only. Templates may not be resold, redistributed, or used for commercial purposes.
Please read our Terms and Conditions before making a purchase.
Need help? I’m happy to assist! Please email hooraytemplatemarket@gmail.com.
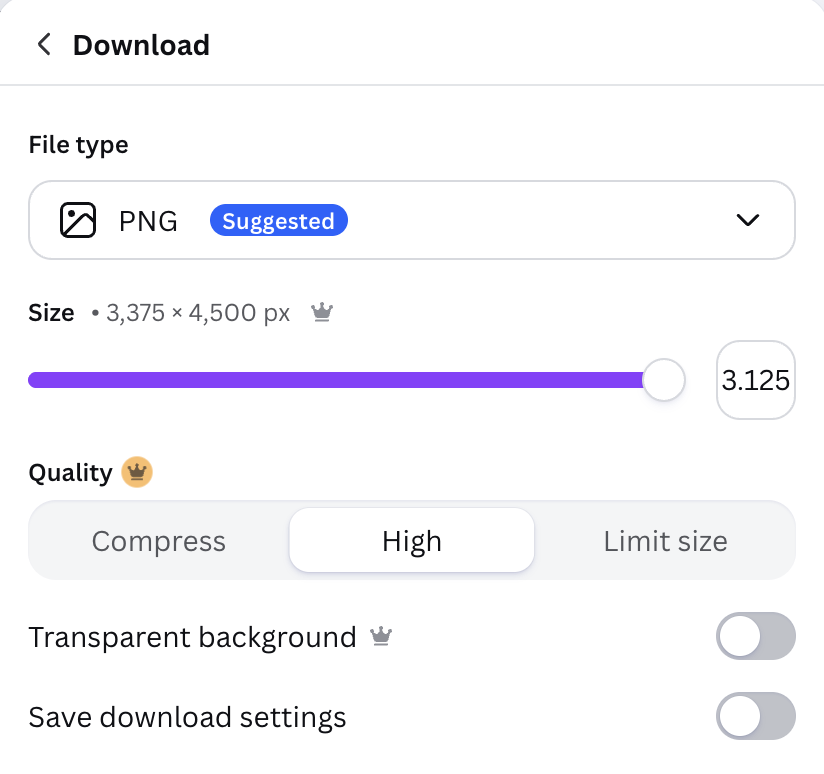
02. Export your final design as a .png file.
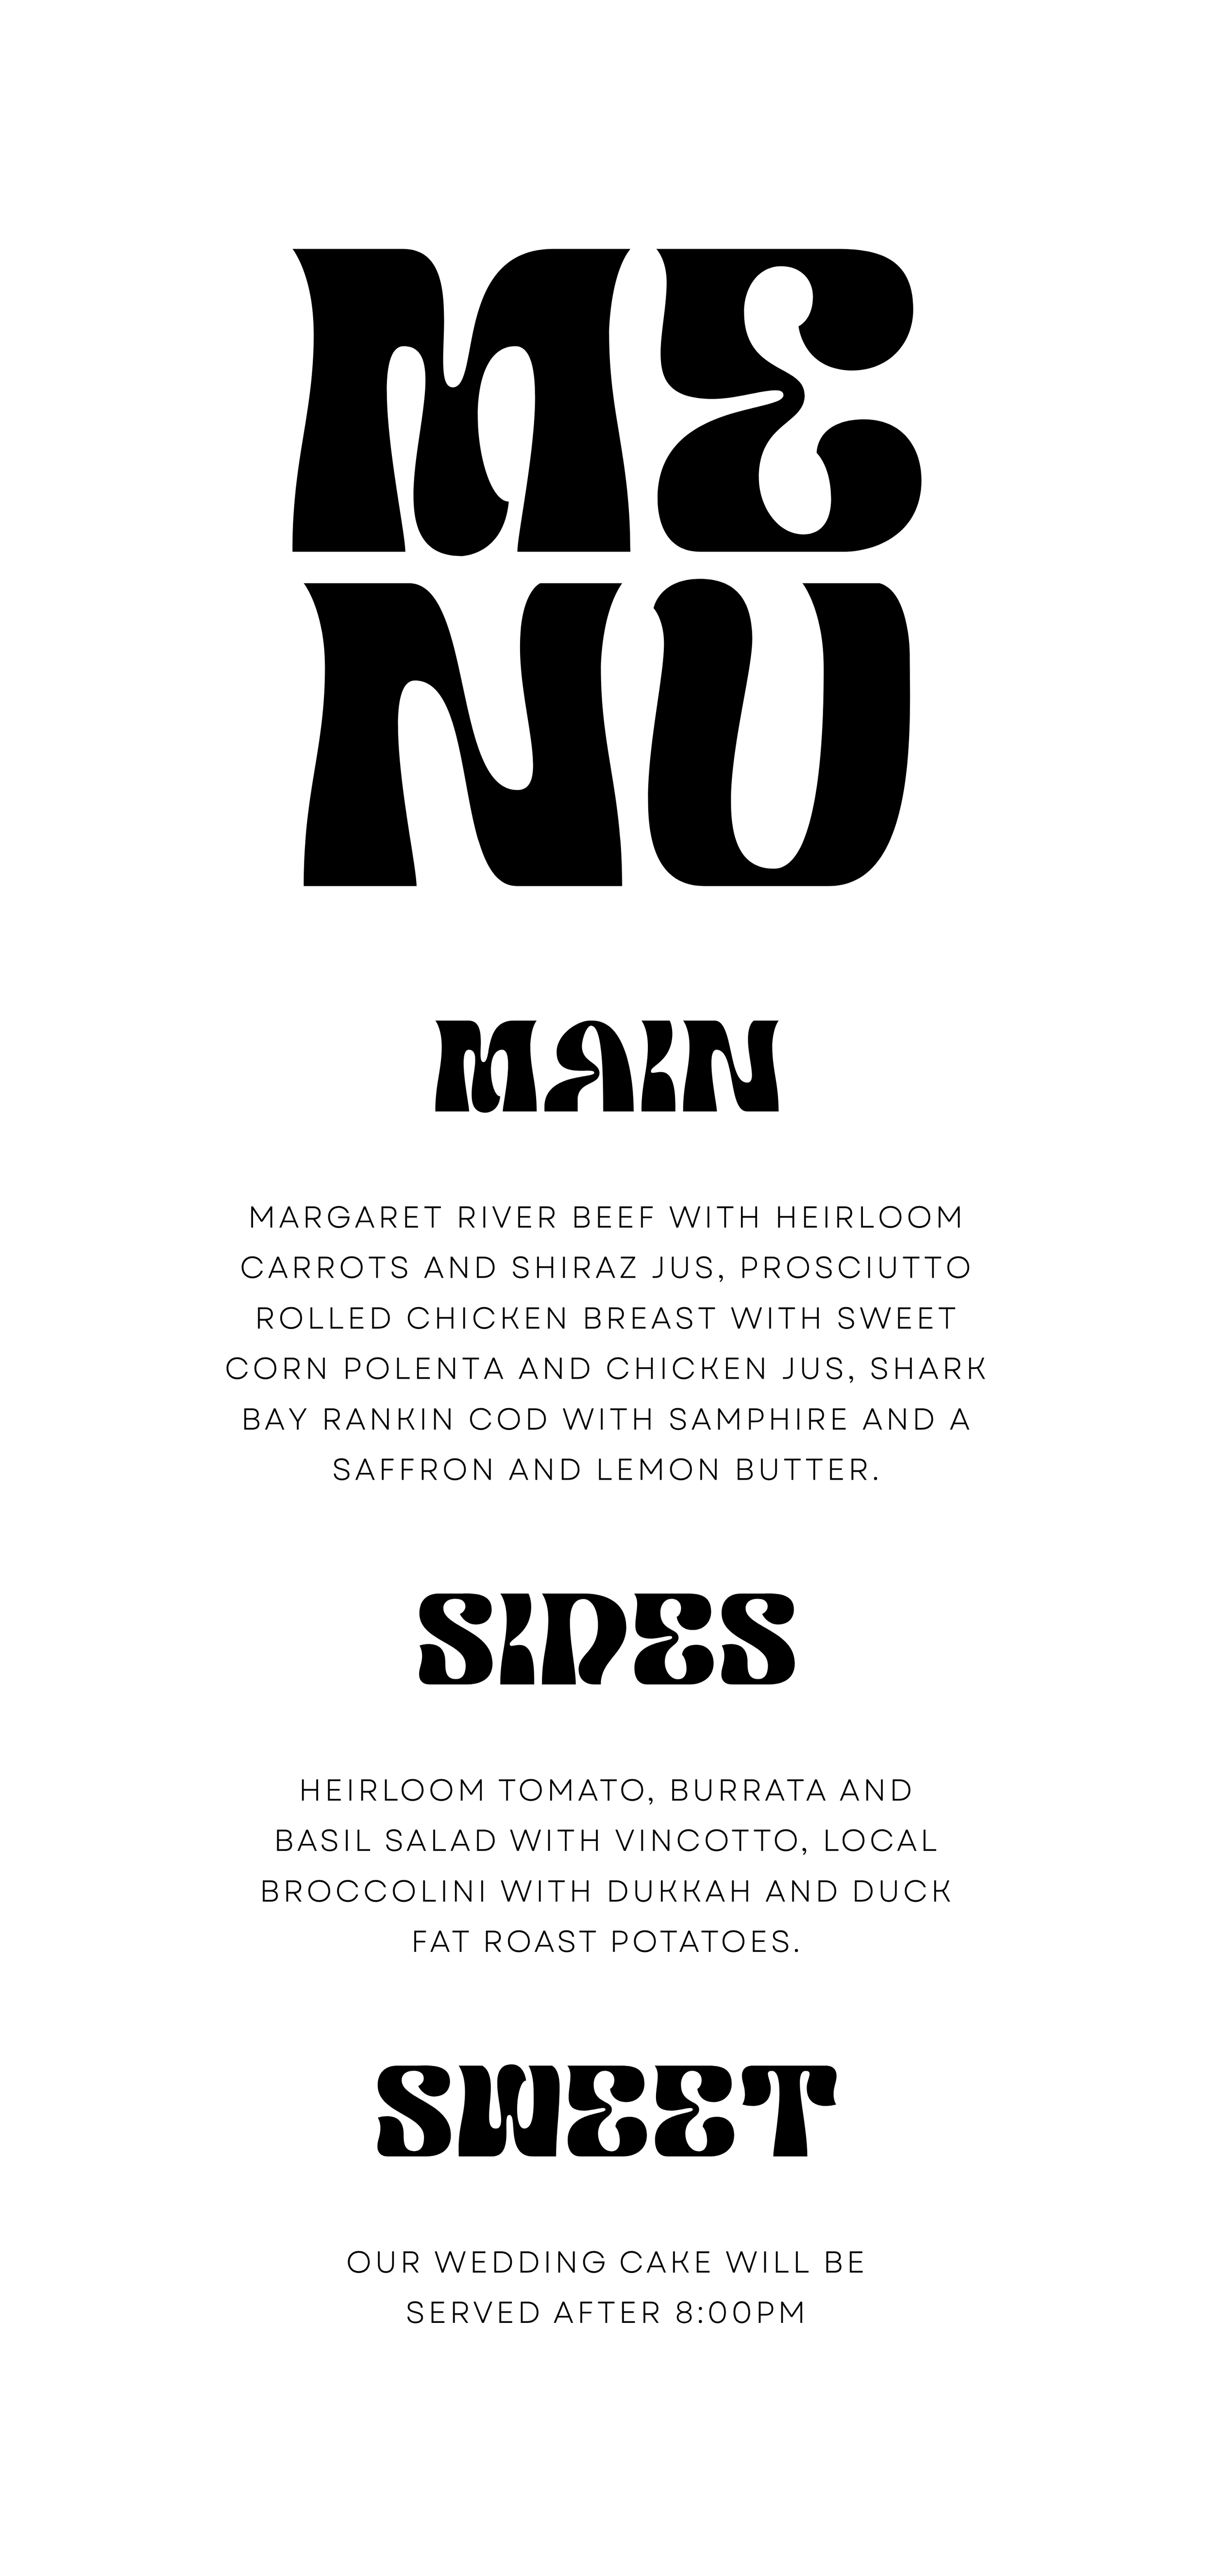
For the best results you will need Canva Pro. Export your file at the highest quality, there is no need to save with a transparent background. Your file will look like this...
03. Upload to Cricut Design Space, follow the ‘Print and Cut’ prompts.
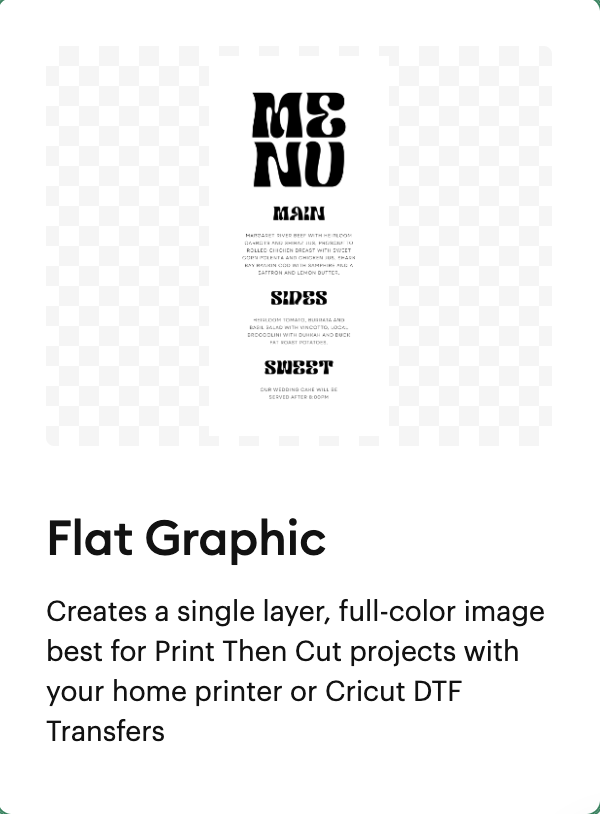
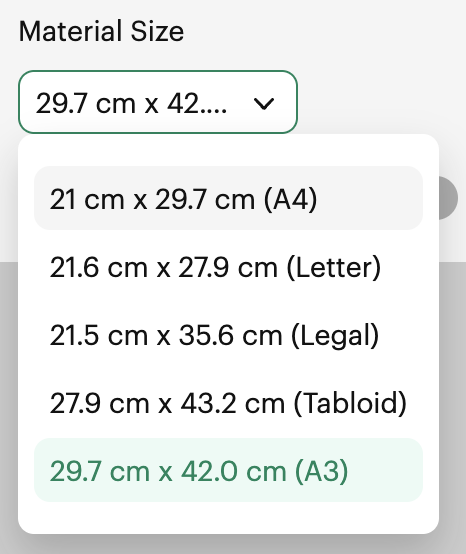
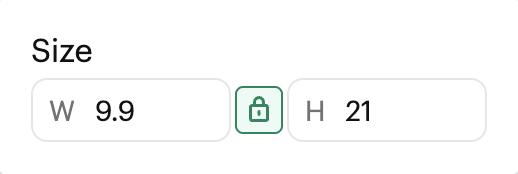
Select the ‘Flat Graphic’ option. Once added to your Cricut canvas, adjust the size to (W) 9.9cm / (H) 21cm (keep the ratio locked). Click ‘Make’ and on the next screen change your material size to the size of the card you will be printing on. Click Continue.
04. Follow the print prompts to save as a PDF.
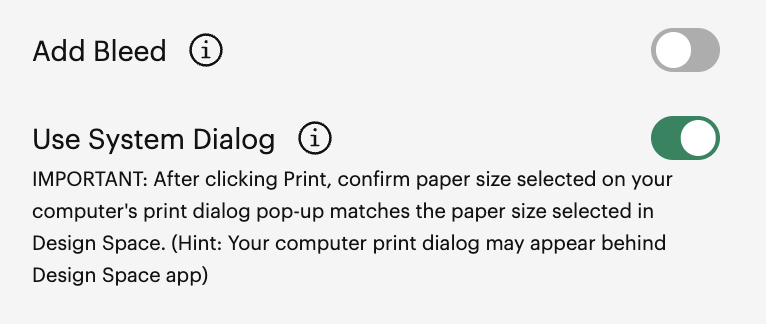
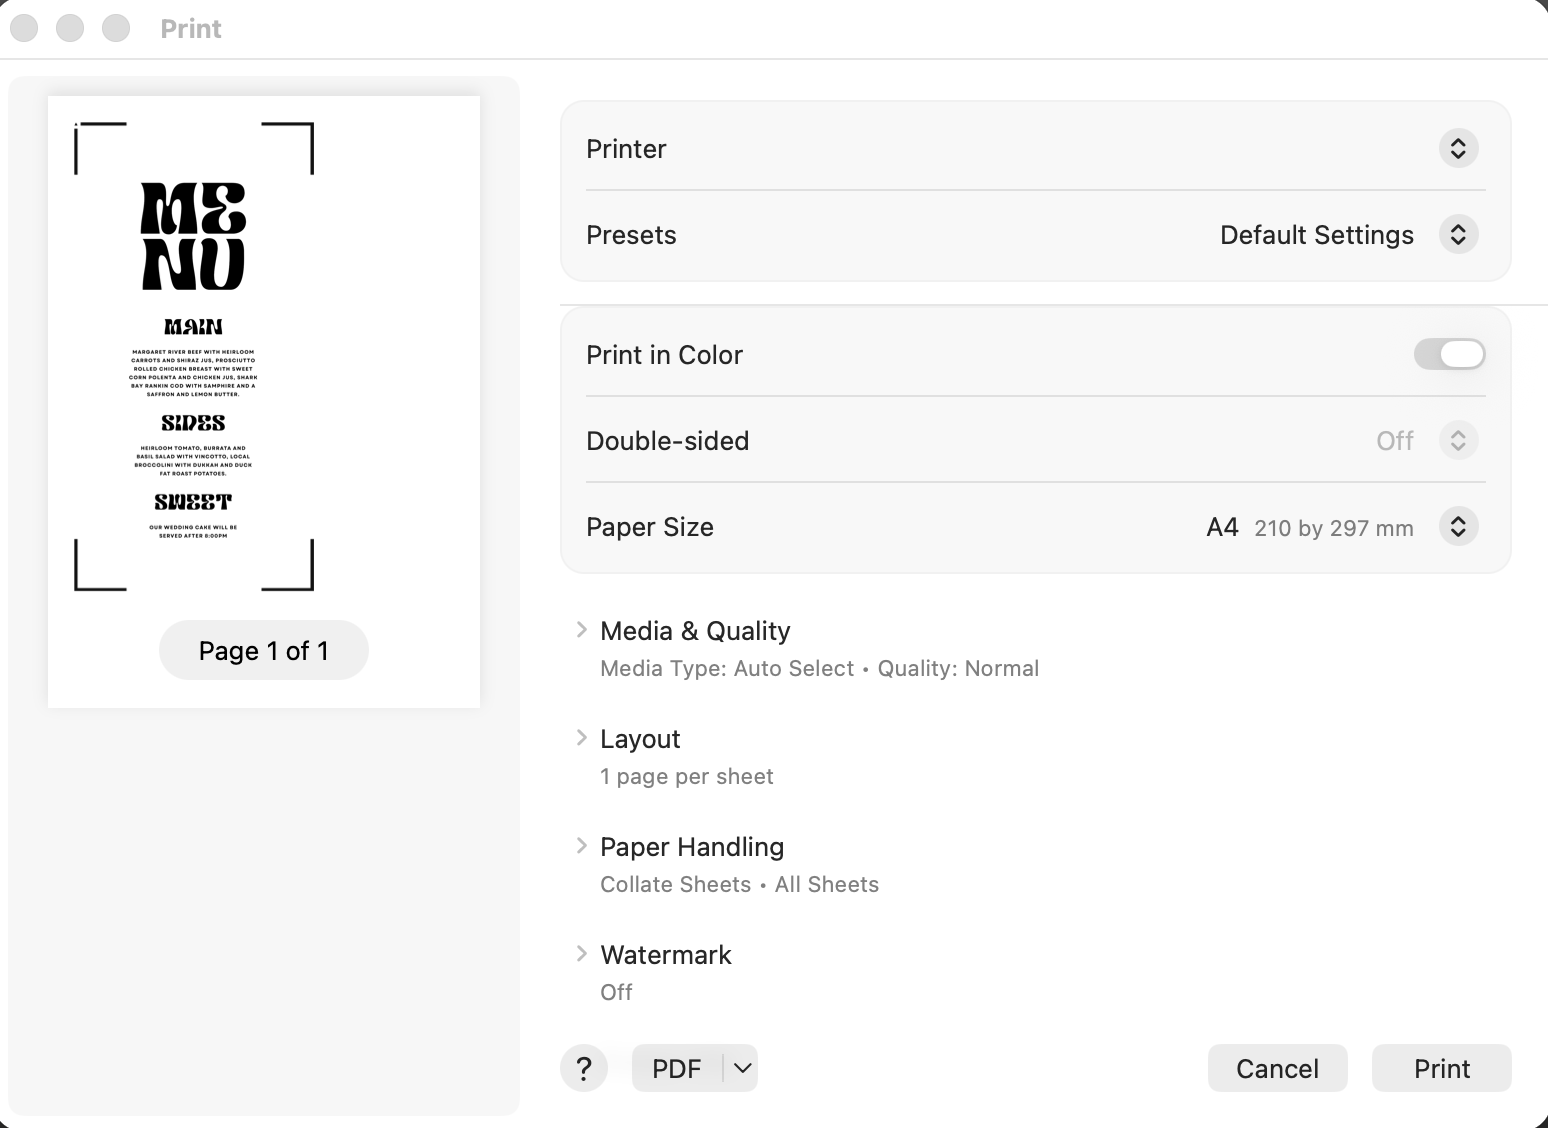
On the ‘Print Setup’ page select ‘Use System Dialog’ and untick ‘Add Bleed’ then print, make sure the right size paper is selected and then click the pdf / save as pdf button, this might be in a different location for different printers. Save the .pdf file somewhere - this is what you will be sending to your printer.
05. Choose your cardstock. 300/350gsm is ideal for wedding stationery. Anything lighter will feel flimsy.
I used the A4 Foil Card from Spotlight. The matte finish metallic card also works, as well as any regular card.
06. Get a test print of your design and cut it out before committing to the full order.
Don't skip this step!
Before printing all of your menus, request some single prints from your printer of choice (I printed these metallic menus at Officeworks). For this particular metallic cardstock, Officeworks used a ‘coated stock’ setting.
One important thing to note: this particular metallic card isn't suitable for inkjet printing at home. It needs to be printed using a laser/toner printer. A test print is the best way to make sure your colours, text and sizing are all looking how you want them before committing to the full batch.
Note: when printing on a reflective metallic card you will need to use a bold font for your text as it is hard to read if it is too light. I have included both in my template. You might need to do a few test prints to get it right.
07. Back in Cricut Design Space, load the .svg shape and do your first test cut.
To use the .svg file, go back to step 3 and load the file as if it is for Print and Cut, but instead of printing it, select ‘I’ve already printed’ and proceed with the normal prompts for cutting out your printed design.
I used the artboard material with a knife blade, test what works for you and your chosen card.

08. Once you are happy with your tests, print the rest and get cutting!
You’ve got your very own DIY wedding menus, printed on beautiful metallic cardstock and cut to size.
And the best part? You did it yourself!
Please note: Just remember that cardstock and printer compatibility can vary, so always check what your printer can handle and do a test print before printing your entire batch.